How to storyboard a film, commercial or video
A practical guide to storyboarding films, commercials, music videos and branded work, from references and first frames through to the shot list.
Storyboarding is where an idea starts becoming a sequence of shots.
For a commercial that may mean proving the product moments and transitions before the client signs off. For a short it may be about blocking a difficult scene. On a smaller shoot it can simply stop you arriving at the location with six references and no clear order.
There is no requirement to draw every frame. Use whatever communicates the shot properly: sketches, photographs, location stills, references or a mixture.
Start with the moments the film depends on
Before filling a board from beginning to end, identify the shots or beats that carry the idea.
A 30-second commercial might have a product reveal, one important transition and an end frame that has to leave room for copy. A music video may depend on a handful of hero images. A short may have one piece of blocking that needs to be understood before the shoot.
Board those moments first. They give the rest of the sequence something to connect to.
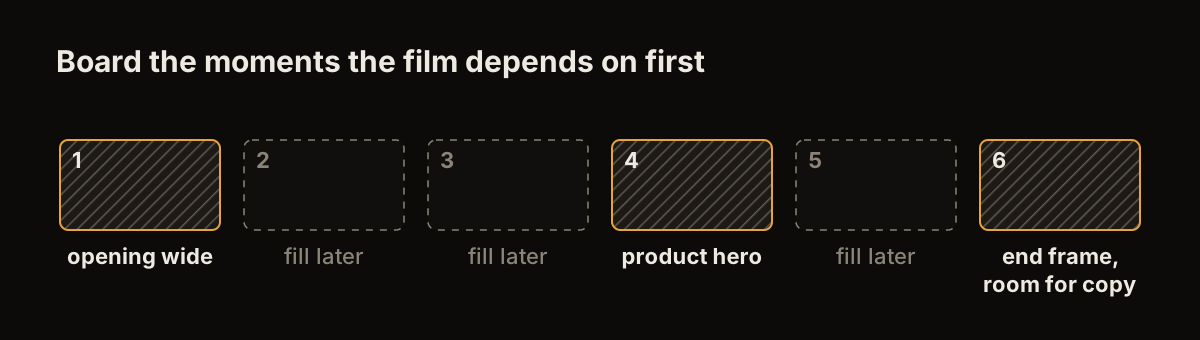
The anchor frames go down first, and the rest of the sequence connects to them.
Work out what each frame needs to explain
Every frame needs a job.
Sometimes it is composition. Sometimes it is screen direction, an eyeline, a camera move or the relationship between two people in the space.
Do not add production information simply because the software gives you a field for it. Add the information that will help somebody understand or shoot the frame.
Choose the fastest useful source for the image
A storyboard can be drawn, photographed or assembled from references.
Sketch when the composition is specific and no existing reference shows it properly. Use a photograph when a location or piece of blocking is already available. Use a film still when it communicates framing, light or lens language efficiently.
References are there to explain an intention. They are not proof that the production can reproduce the shot exactly, so keep practical constraints in mind.
Build the sequence
Once the anchor frames are in place, fill the gaps and read the board as a sequence.
Look at the whole board rather than polishing individual frames too early. Repeated shot sizes, awkward jumps and missing geography are easier to spot when the sequence is visible together.
For dialogue or action, pay attention to screen direction and where people are looking. For commercials and music videos, check the rhythm of the image changes and whether the important moments are arriving where they need to.
Add notes only where the picture needs help
A useful note might explain:
- camera pushes with talent
- product rotates into final position
- hold negative space for supers
- whip pan carries the cut
- same setup as shot 12
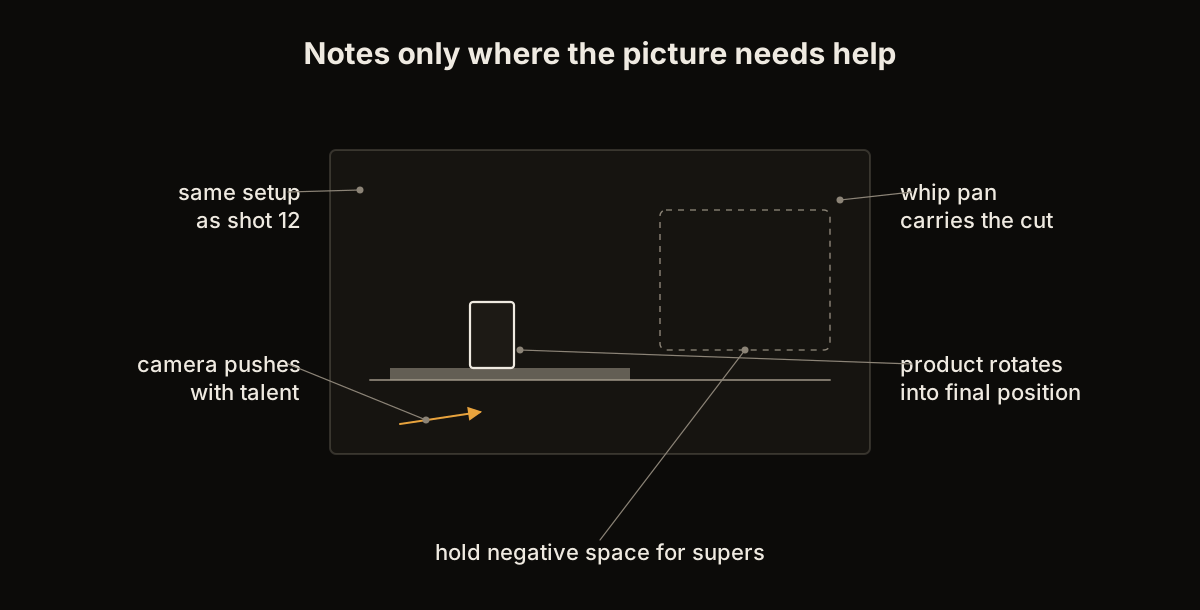
A note that adds something, beside a note that describes the frame back to you.
That is usually more useful than a paragraph describing what is already obvious in the frame.
If a client is reviewing the board, keep internal production notes separate where possible. The client needs to understand the proposed film, not every practical conversation happening behind it.
Check the aspect ratio early
A board for 9:16 behaves differently from 16:9. A 2.39:1 frame changes where people sit in the composition. If the job needs both landscape and vertical deliverables, plan for that before the shoot rather than assuming every frame will crop cleanly later.
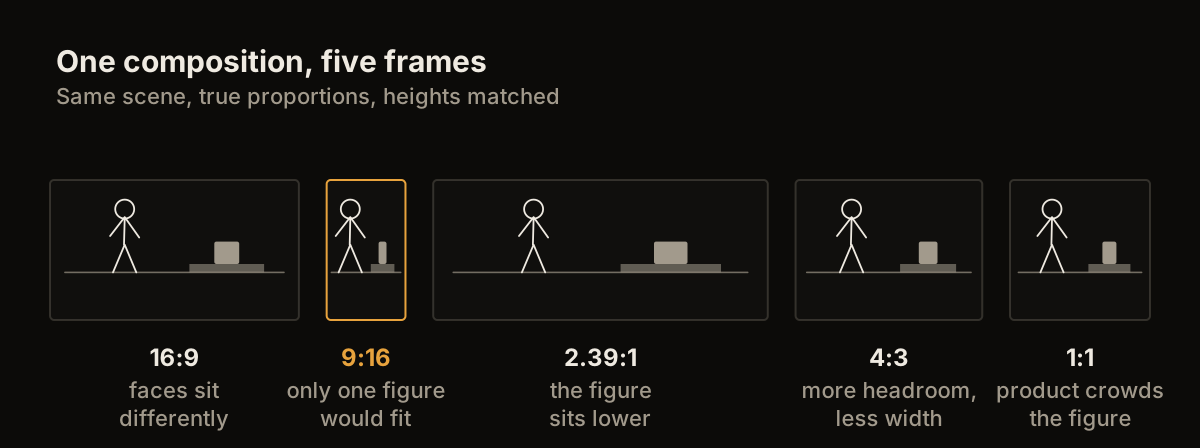
The same shot in each of the five board ratios.
Storybrdr supports common production ratios including 16:9, 9:16, 2.39:1, 4:3 and 1:1.
Share it before the shoot
A board is useful because it lets people react before the expensive part starts.
For client work, that may mean formal notes and approval. On an independent short it may be the DoP checking the sequence. On a two-person shoot it may simply be the other person seeing the plan before call time.
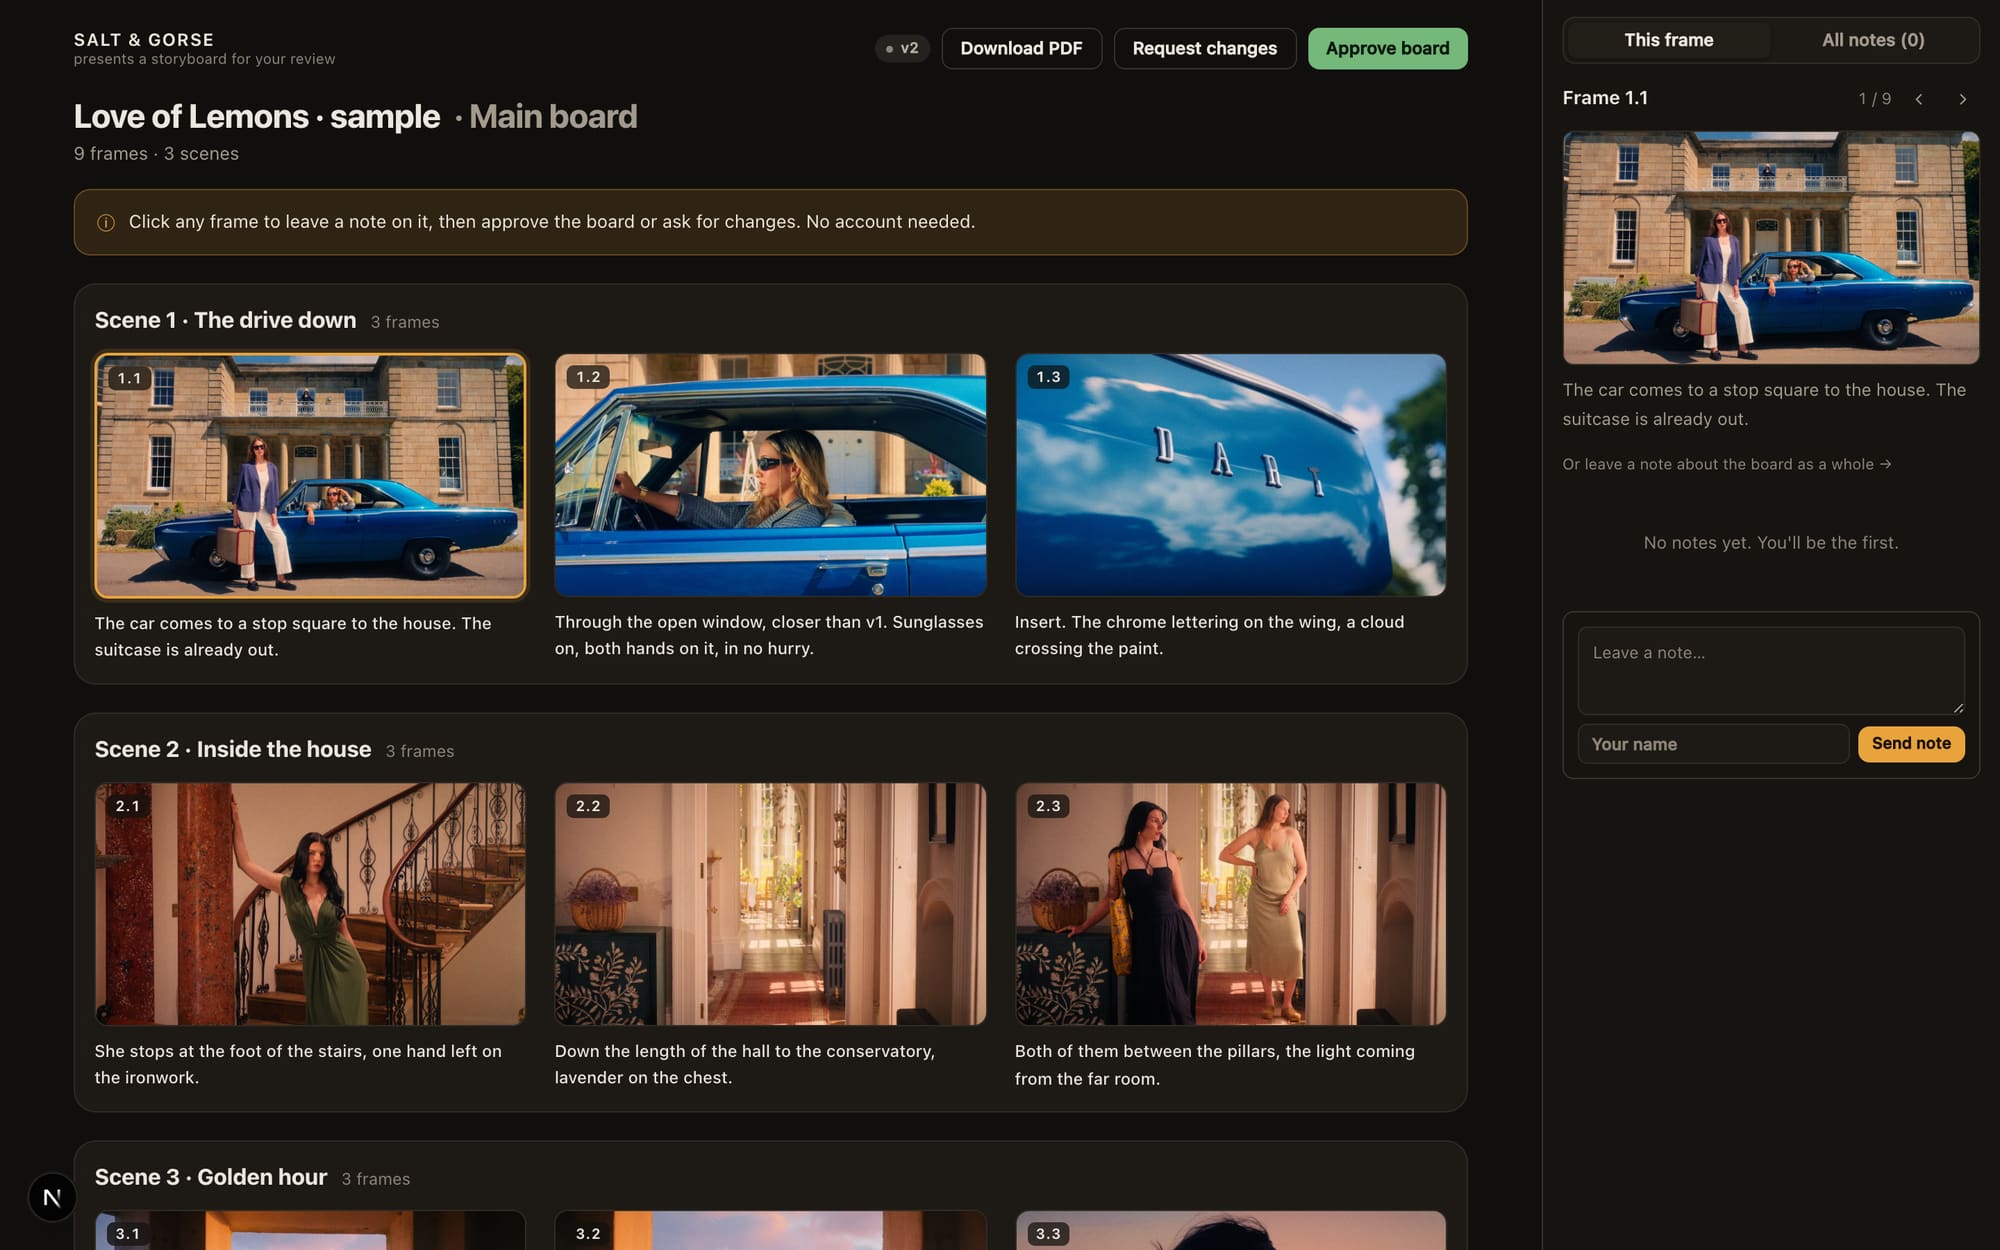
The client review page, no account needed.
Resolve the important questions while changing a frame is still cheap.
Separate story order from shooting order
The storyboard normally follows the film.
The shoot rarely does.
Once the board is settled, group shots into the order that makes sense for the day. That might mean finishing a location before moving, keeping a lighting setup together or shooting all of one talent's work in the same block.
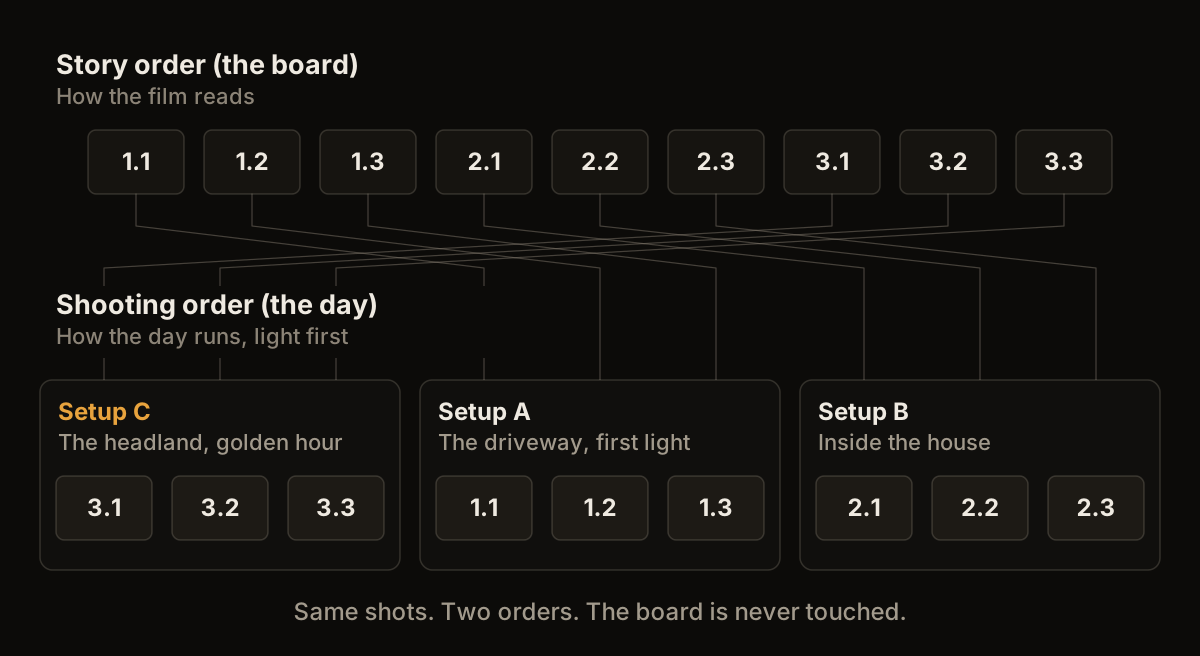
The same shots read twice: story order above, shooting order below.
Keep the storyboard order intact. Create a shooting order from the same shots.
Use the board on set
The board should still be useful when the camera comes out.
Keep the frame beside the shot. Mark what has been completed. Record useful take information and pickups while they are fresh. If continuity photographs matter, keep them attached to the relevant shot rather than creating another loose folder to sort later.
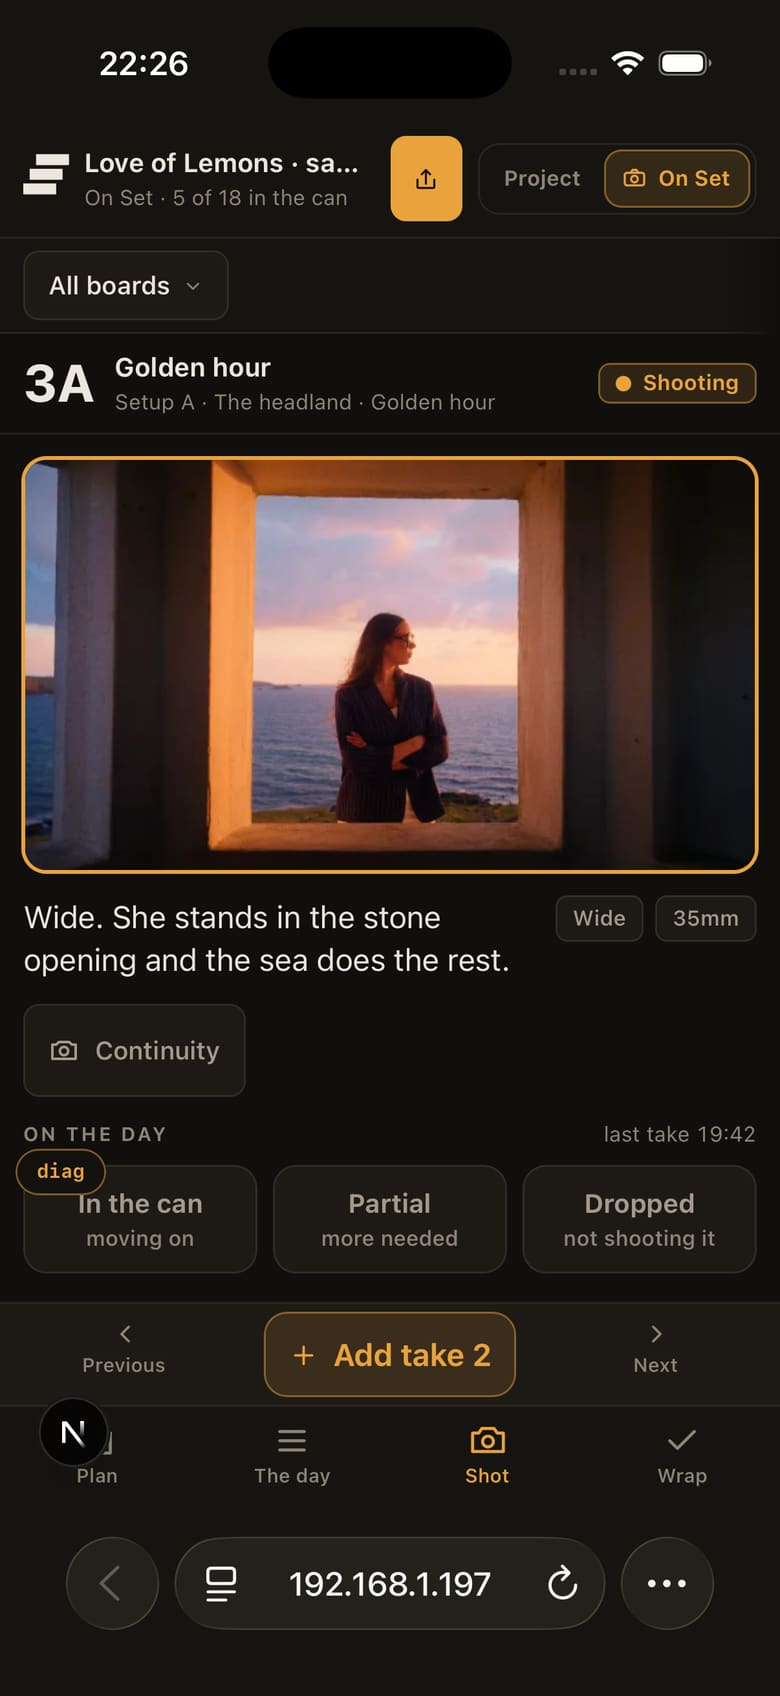
One shot on a phone during the day, in the sample project.
A simple board used all the way through a production is often more useful than an elaborate board that disappears once the PDF is approved.
A practical storyboard checklist
Before the shoot, check that the board makes the sequence understandable, the important frames are clear, the aspect ratio is right, any essential movement is noted and the shots have been turned into a workable shooting order.
That is enough for many productions. Add more detail when the job needs it, not because a template says you should.